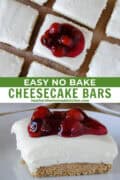
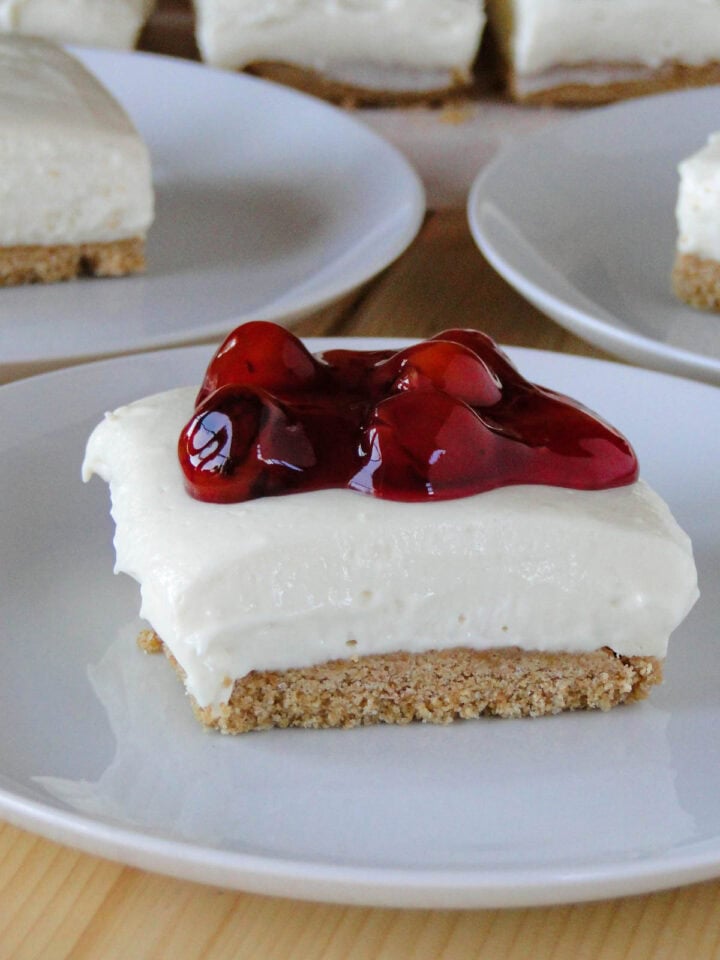
These No Bake Cheesecake Bars have a buttery graham cracker crust with a creamy cheesecake filling that is absolutely divine. The easiest and perfect no bake sweet treat!
This post may contain affiliate links. As an Amazon Associate I earn from qualifying purchases at no extra cost to you. Click HERE to read my policies.
This post was originally posted on 4/20/2020 and updated on 7/17/2024.
Why We Love These No Bake Cheesecake Bars
- This is the perfect make ahead dessert.
- The recipe is simple and quick. Can be in the fridge chilling in less than 20 minutes.
- This recipe is a crowd-pleaser. Perfect for parties, pot-lucks and sharing with friends and family.
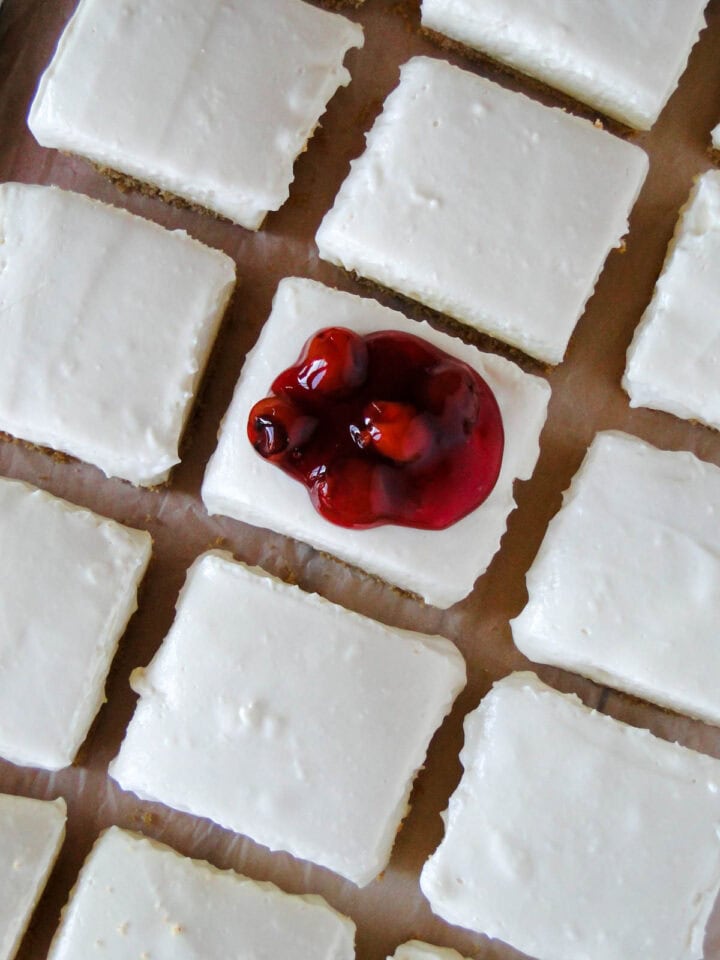
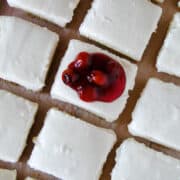
- These cheesecake bars are customizable. They can be left plain or topped with your favorite fruit jam, pie filling, chocolate or caramel sauce.
- No jello, pudding or gelatin needed.
- These bars are so incredibly delicious with a perfect creamy filling and the best buttery graham cracker crust.
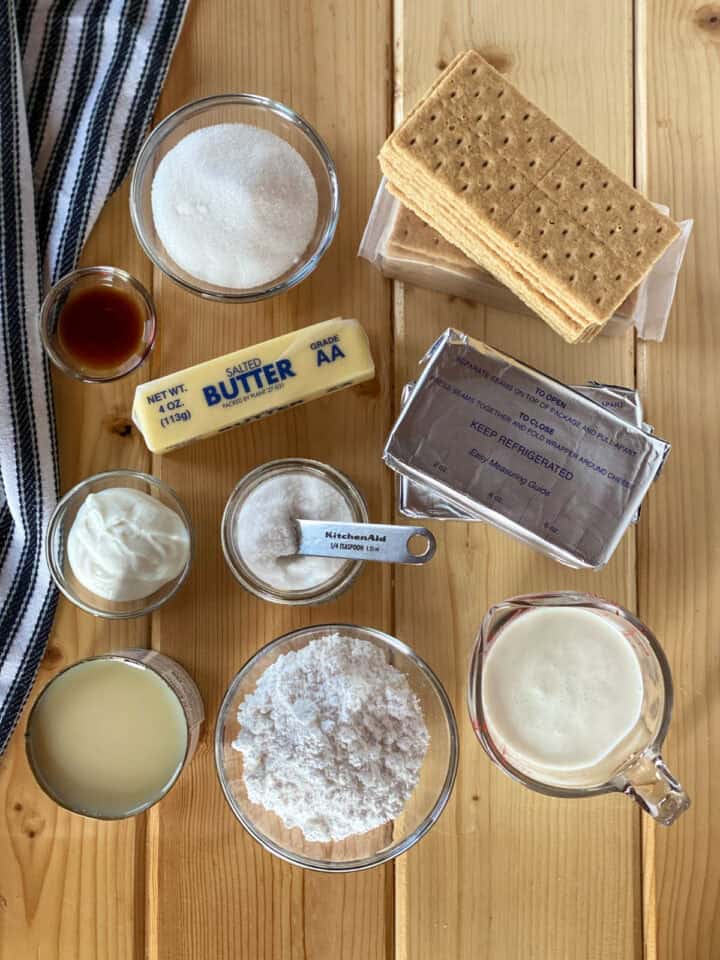
No Bake Cheesecake Bars Recipe Ingredients
- Graham Cracker Crumbs
- Granulated Sugar
- Salted Butter
- Cream Cheese
- Sweetened Condensed Milk
- Sour Cream
- Pure Vanilla Extract
- Salt
- Heavy Whipping Cream
- Powdered Sugar
Substitution Suggestions
- Honey Graham Crackers: You can also use vanilla waffers or golden oreo cookies as well as shortbread cookies. All are good substitutes.
- Salted Butter: Unsalted butter can be used, I would recommend adding ¼ teaspoon of salt to the cracker crumbs.
- Sweetened Condensed Milk: Make sure it is sweetened condensed milk and not evaporated milk. Both are in a can and near each other on the shelves. Evaporated milk will NOT work in this recipe.
- Sour Cream: You can also use plain Greek yogurt or Vanilla Greek yogurt.
- Pure Vanilla Extract: Using pure extracts are essential, especially in desserts that aren't baked. Imitation extracts leave a very unpleasant after taste.
- Whipping Cream and Powdered Sugar: If you want to skip making the whipped cream you can use premade whipped topping. The real thing tastes way better though!
How to Make No Bake Cheesecake Bars
- First, line a 9x13 baking dish with parchment paper, leaving at least a half inch overhang on the long sides.
- Place the graham crackers in the food processor and pulse until fine crumbs. Next, add the granulated sugar and melted butter and pulse until completely combined.
Pro Tip*** If you don't have a food processor, no worries. Add the graham crackers to a zip top bag and crush them with a rolling pin until fine crumbs. Add the sugar and melted butter right in the bag with the crumbs, close the bag, and then mix together with your hands until it is all incorporated well.
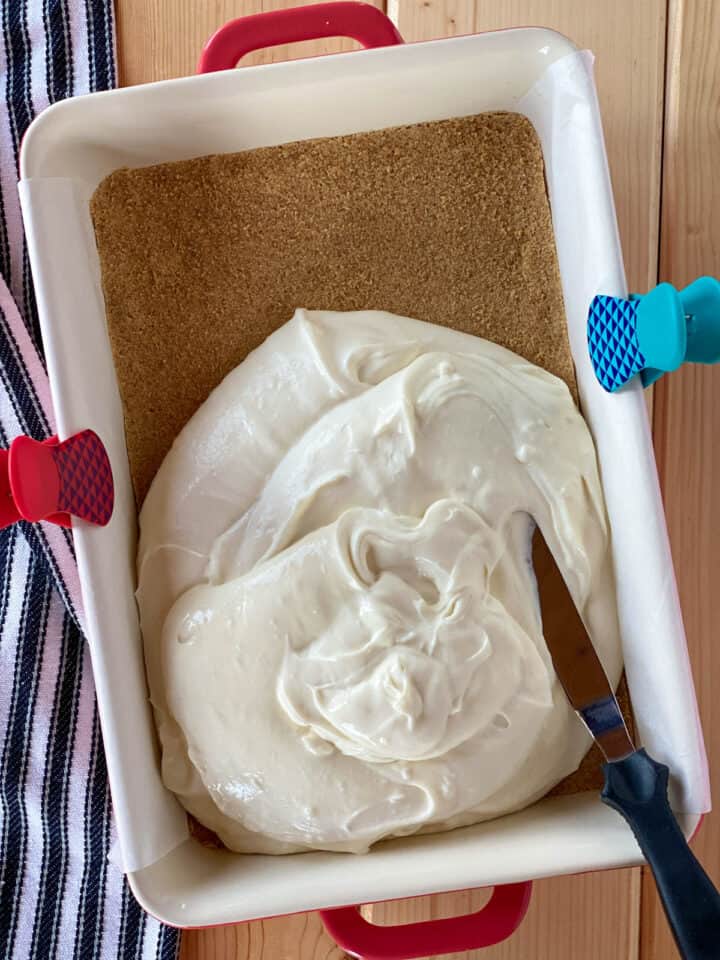
- Pour the crumbs into prepared dish and using either your hand or the bottom of a flat measuring cup, evenly press the crumbs down so they are nice and firm.
- Place the crust in the fridge to chill while you make the filling.
- Next, in a stand mixer fitted with paddle attachment or large mixing bowl with hand beaters, beat the cream cheese until smooth. This will take 3-4 minutes. Then add the entire can of sweetened condensed milk, sour cream, vanilla extract and salt. Beat until smooth and airy.

- Now use the whisk attachment on the stand mixer and whisk the heavy cream until soft peaks form.
- Then add the powdered sugar and beat until there are stiff peaks.
- Add the stabilized whipped cream, a little at a time, to the cream cheese mixture. Gently fold it in being careful not to lose any air in the whipped cream.
- Pour the filling over the crust and spread out evenly.
- Place the bars into the refrigerator and chill for at least 3-4 hours. I have discovered that chilling them overnight is the best!
Toppings for Cheesecake Bars
These bars are delightful all on their own, but you can fancy them up with some delicious toppings.
- Jam or Jelly
- Pie Filling
- Chocolate Sauce
- Macerated Berries
- Fresh Fruit
- Caramel Sauce
- Lemon Curd
- Extra Whipped Cream
Storing Cheesecake Bars
These no bake bars need to be stored in the fridge. Store them in an airtight container for up to 5 days. Honestly, who would let them last that long?!
I have not tried freezing these cheesecake bars. If you do, let me know how they turn out!
Is cheesecake your thing? Then you need to try these other cheesecake recipes!
Tips for No Bake Cheesecake Bars
- Measure out your graham cracker crumbs. If you use too many the crust will crumble apart. If you don't use enough the crust will be greasy.
- I like to use chip clips or clothes line clips to secure the parchment paper on the sides of the dish. This helps the paper stay in place while I pat down the cookie crust.
- Use a flat bottomed measuring cup to pack the crust down. It's so much easier than using your hands.
- Start with room temperature cream cheese. It really helps to beat it smooth and get rid of any lumps.
- To get clean cuts, use a sharp chef's knife, do not use a sawing motion and wipe the blade off in-between each cut.

No Bake Cheesecake Bars
Ingredients
Crust
- 2½ cups graham cracker crumbs, about 2 packages or 18 sheets
- ⅓ cup sugar
- ½ cup salted butter, melted
Cheesecake Filling
- 24 ounces cream cheese, 3 packages
- 14 ounces sweetened condensed milk
- 2 tablespoons sour cream
- 1 teaspoon pure vanilla extract
- ¼ teaspoon salt
- ¾ cup heavy whipping cream
- ½ cup powdered sugar
Instructions
Crust
- Line a 9x13 baking dish with parchment paper, leaving at least a half inch overhang on the long sides.
- Place the graham crackers in the food processor and pulse until fine crumbs.
- Add the granulated sugar and melted butter and pulse until completely combined.
- Pour the crumbs into the prepared dish, using your hands or the bottom of flat measuring cup, firmly press the crumbs evenly to fit the whole dish.
- Place the crust in the fridge to chill while you make the filling.
Cheesecake Filling
- In a stand mixer fitted with paddle attachment or large mixing bowl with hand beaters, beat the cream cheese until smooth. This will take 3-4 minutes.
- Then add the entire can of sweetened condensed milk, sour cream, vanilla extract and salt. Beat until smooth and airy.
- Now use the whisk attachment on the stand mixer and whisk the heavy cream until soft peaks form.
- Then add the powdered sugar and and beat until there are stiff peaks.
- Add the stabilized whipped cream, a little at a time, to the cream cheese mixture. Gently fold it in being careful not to lose any air in the whipped cream.
- Pour the filling over the crust and spread out evenly.
- Place the bars into the refrigerator and chill for at least 3-4 hours. I have discovered that chilling them overnight is the best!
- Cut into 24 bars, add your favorite topping and enjoy!
Leave a comment