
These Chocolate Covered Cherry Cookies are the kind of homemade treat that grabs your attention with one bite thanks to a chewy chocolate base, a cherry tucked in the center, and a chocolate cherry fudge sauce on top. They are fun to make, extra delicious, and perfect for anyone who loves rich chocolate and bright cherry flavor without using maraschino cherries.

This post may contain affiliate links. As an Amazon Associate I earn from qualifying purchases at no extra cost to you. Click HERE to read my policies.
After decades of baking in restaurant kitchens and years of creating from scratch recipes for my family, I have tested more batches of thumbprint cookies than I can count. My professional background, hands on experience, and helpful crew of taste testers allows me to confidently share a cookie that truly works. Since we have to avoid artificial food dyes, I tweaked a family recipe by swapping the cherries, and used canned sweet cherries which turned out to be the perfect solution. These happen to be Ava's favorite, which means they have passed every kid approved test for texture, flavor, and holiday charm. We have to make them every Christmas!
Why We Love These Chocolate Covered Cherry Cookies
- These cookies are made without artificial food dyes thanks to using canned sweet cherries instead of maraschino cherries.
- The chewy chocolate cookie base gives you a rich brownie like bite in every cookie.
- Chocolate lovers get double the chocolate from the dough and fudge sauce.
- They offer a fun twist on classic thumbprint cookies that feels both nostalgic and homemade.
- These are freezer friendly, making them great for holiday prep and cookie trays.
- They are Ava's favorite, which means they are fully approved by kid taste testers.
- They are perfect for holidays, potlucks, and cookie exchanges!
Chocolate Covered Cherry Cookie Recipe Ingredients
- Salted Butter
- White Sugar
- Large Eggs
- Pure Vanilla Extract
- Unsweetened Cocoa Powder
- Baking Powder
- Baking Soda
- Salt
- Unbleached All Purpose Flour
- Canned Sweet Cherries
- Semi-Sweet Chocolate Chips
- Sweetened Condensed Milk
Substitution Suggestions
- Salted Butter: Feel free to use unsalted butter. I suggest added an additional ½ teaspoon of salt to the cookie dough.
- Pure Vanilla Extract: I recommend always using pure extracts when at all possible. They give your baked goods such a better flavor rather than the imitation stuff.
- Cocoa Powder: I like using Hershey's cocoa powder for this recipe. You can use a dutch cocoa powder and it will be more rich. You can also use Hershey's Special Dark cocoa powder. It adds great chocolate flavor!
- All Purpose Flour: I have only made these cookies with all purpose flour, but if you wanted to try them with whole wheat flour they should work. The cookie might turn out a bit more dense.
- Canned Cherries: I use the canned dark sweet cherries in 100% juice. You can used canned cherries in syrup too. They both will work. I also have used dark morello cherries. They are a little bit smaller in size and just as delicious in these cookies. If you don't need to worry about artificial food dyes, you can also use maraschino cherries.
- Semi-Sweet Chocolate Chips: If you prefer you can use milk chocolate chips for a sweeter topping or you can use dark chocolate chips for a more rich chocolate fudge sauce. I have only used semi-sweet and dark chocolate chips, they were both amazing!

How to Make Chocolate Cherry Thumbprint Cookies
- First, preheat oven to 350°F and line at least 2 cookie sheets with parchment paper.
- Next, drain the cherries and reserve the liquid. Cut the cherries in half and set aside. You may have to quarter some of the cherries depending on how many are in the can. I only had to do it to a couple.
- In the bowl of stand mixer fitted with paddle attachment or with a large bowl and hand mixer, cream together the softened butter and granulated sugar until light and fluffy. This will take 2-3 minutes.
- Then add the eggs, one at a time, beating well after each addition and scraping the sides and bottom of bowl as needed.
- Now beat in the vanilla extract.

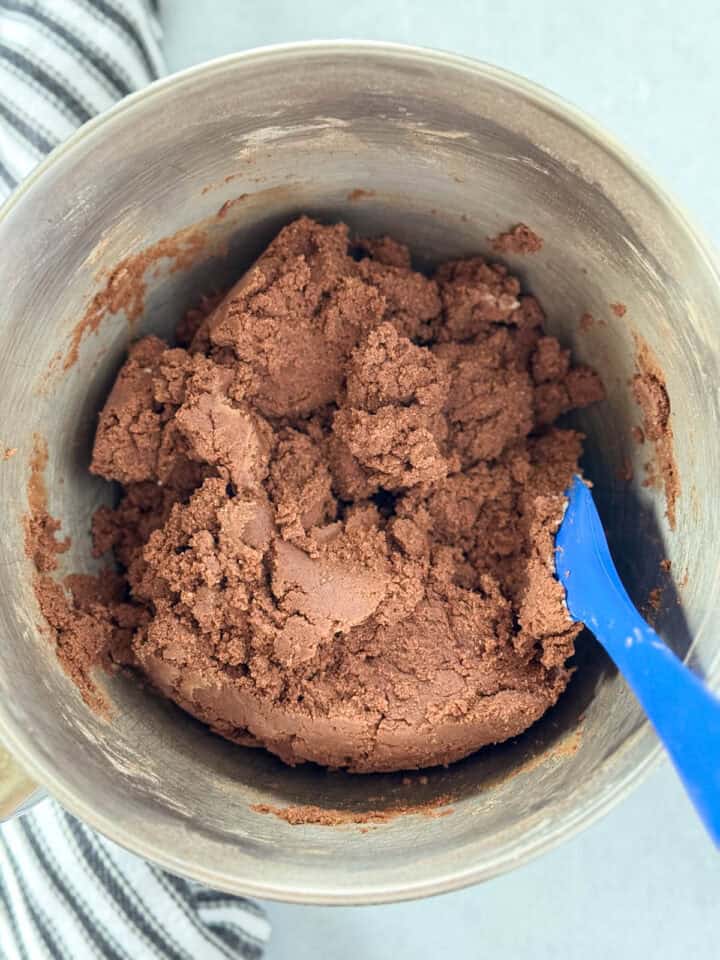
- Add the dry ingredients: cocoa powder, baking powder, baking soda, salt and all purpose flour. Mix on low speed just until everything is fulling combined. Scrape the bottom of the bowl to ensure everything is completely blended.
- Next, using a small cookie scoop or a tablespoon, scoop dough and place 2 inches apart on cookie sheets.
- Roll each scoop into a smooth ball and then make an indent with your thumb or a teaspoon measuring spoon in the center. I like to use the teaspoon because it makes a perfect indent.
Expert tip: the cookies are going to crack a little bit when you make your thumbprint. To eliminate some cracks, only push the cookie down about half way and then smooth out any cracks with your hands. If they are cracking too much, re-roll the cookie and then press down again. The warmth of your hands will help stop some of the cracking.


- Now place a cherry half in each cookie.
- Then in a microwave safe bowl, combine the chocolate chips and sweetened condensed milk. Microwave in 30 second intervals stirring after each one until the chocolate chips are completely melted and smooth.
- Now add 3 tablespoons of the reserved cherry juice to the chocolate sauce and stir it all together well.

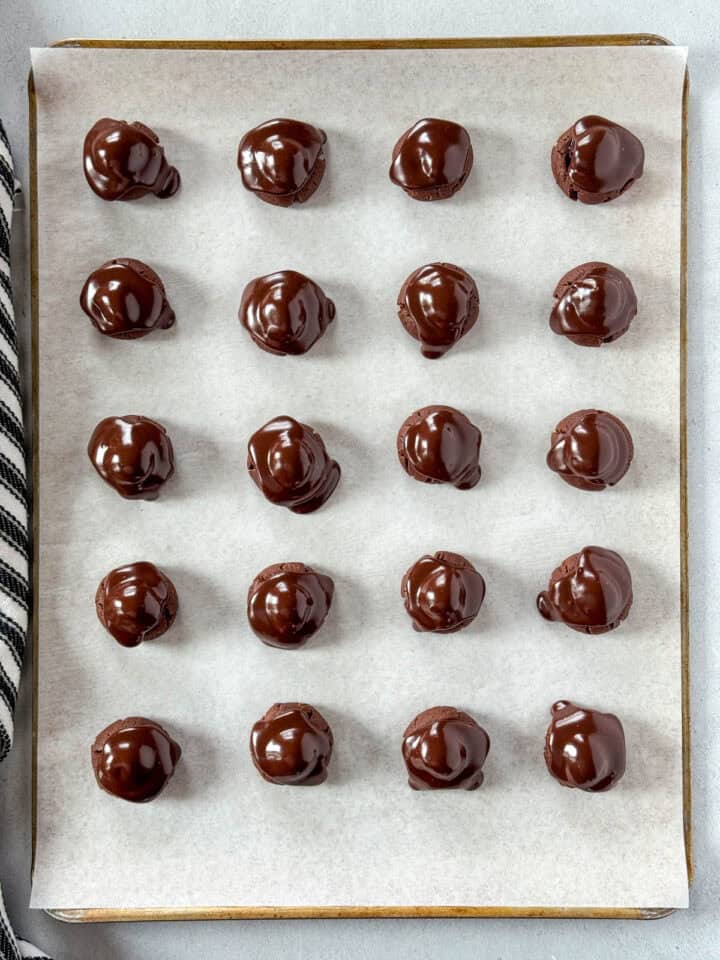
- Dollop about a teaspoon or so of sauce on top of the cherry pieces.
- Bake cookies in preheated oven for 8-10 minutes until cookies look set.
- Let cookies cool on pan for 10 minutes and then carefully remove to wire rack to cool completely.
Expert tip: I like to make these in an assembly line. I roll all the dough first, then indent them, and add the cherry and chocolate sauce. It goes much smoother and faster.

I happen to love thumbprint cookies for the holidays! If you are the same try this classic recipe for Raspberry Almond Thumbprint Cookies! These cookies were my Grandma's favorite Christmas cookie!
Storing Chocolate Cherry Thumbprint Cookies
Storing: Make sure the cookies are completely dried and set before storing. Then store in an air tight container between layers of wax paper. Keep them in a cool dry place and they'll last a week or so.
Freezing: These cookies freeze well! Place the cookies in a freezer safe air tight container between layers of wax paper. Label, date and freeze. Cookies will last 3-4 months in the freezer.
Thawing: To thaw the frozen cookies, I like to take them out of the container and place them in a single layer on a plate or tray to thaw. This will help the topping stay adhered to the cookie and not pull away with the wax paper.
Heather's Favorite Tools for this Recipe
- My MOST favorite tool in my kitchen is my KitchenAid Stand Mixer. It's the best ever for making cookies, frostings and so many other things.
- Long ago, I used to be a Pampered Chef consultant and I still prefer their baking tools and pans to any others. Their cookie sheets are the only ones I use for cookies. Find yourself a consultant, host a party and treat yourself to a set. These aluminum sheet pans from Nordic Ware are a great option too.
- A cookie scoop that holds about 1 tablespoon is great for these cookies. Again I use the pampered chef one but this small cookie scoop from OXO on Amazon is a great one.
- Pre-cut parchment paper is a life saver and so easy. No cutting my fingers!
- Or this silicone baking mat is great for baking too!
- You can package these cookies up for family and friends in these Self Sealing Cellophane Bags. They are the best!

Tips for Chocolate Cherry Thumbprint Cookies
- Gather all the ingredients before you start. It is so much easier to bake when all the ingredients are ready. There is also less room for error, like forgetting an essential ingredient. I'm not saying I've done this, however, I am speaking from experience!
- Read the recipe from start to finish before you start. Again, I am speaking from experience.
- Use room temperature ingredients. It helps the dough come together better, and also helps with even baking.
- Always fluff your flour and then spoon and level it to measure. Doing this will prevent too much flour being added and ultimately making the cookies too dry and crumbly. To fluff your flour, just scoop it and dump it a few times and then measure it out, or give it a fluff using a whisk.
- Use a cookie scoop to get the same size cookies, that way they will all bake evenly. I like to use the Pampered Chef small scoop which is equal to about 1 tablespoon.
- Work in an assembly line with these cookies. This recipe makes a lot of cookies so it helps get them done faster.
- If the chocolate sauce gets too thick, add a little more cherry juice to thin it out.
- If using cookie sheets more than once during baking, make sure the cookie sheet is completely cooled before adding scoops of cookie dough on it.
- For best results don't over bake the cookies. Over baking will cause the cookies to be dry.
- You will have extra chocolate sauce, place it in a container and chill in the fridge. You can eat it as fudge or make it into truffles.

More Christmas Cookies:
- Peanut Butter Temptations
- Spritz Butter Cookies
- Gingerbread Men
- Italian Almond Cookies
- Chocolate Coconut Candy
- Christmas Crack
- Hot Cocoa Cookies
- Frosted Pumpkin Drops
- Chewy Molasses Cookies
- Chocolate Peppermint Cookies
Did you make this recipe? Rate it!
If you enjoyed this recipe give it a ⭐⭐⭐⭐⭐ rating in the comments below. It really helps the recipe stand out and I appreciate the feedback to make recipes everyone will enjoy.

Chocolate Covered Cherry Cookies
Ingredients
- 1 cup salted butter, softened
- 2 cups white sugar
- 2 large eggs
- 1 tablespoon pure vanilla extract
- 1 cup unsweetened cocoa powder
- ½ teaspoon baking powder
- ½ teaspoon baking soda
- ½ teaspoon salt
- 3 cups unbleached all purpose flour
- 15 ounce can dark sweet cherries, drained and juice reserved
- 1½ cups semi-sweet chocolate chips
- 14 ounce can sweetened condensed milk
- 3 tablespoons reserved cherry juice
Instructions
- Preheat oven to 350°F and line at least 2 cookie sheets with parchment paper.
- Drain the cherries and reserve the liquid. Cut the cherries in half and set aside. You may have to quarter some of the cherries depending on how many are in the can.
- In the bowl of stand mixer fitted with paddle attachment or with a large bowl and hand mixer, cream together the softened butter and granulated sugar until light and fluffy. This will take 2-3 minutes.
- Add the eggs, one at a time, beating well after each addition and scraping the sides and bottom of bowl as needed.
- Beat in the vanilla extract.
- Add the cocoa powder, baking powder, baking soda, salt and all purpose flour. Mix on low speed just until everything is fulling combined. Scrape the bottom of the bowl to ensure everything is completely blended.
- Using a small cookie scoop or a level tablespoon, scoop dough and place 2 inches apart on cookie sheets. Roll each scoop into a smooth ball and then make an indent with your thumb or a teaspoon measuring spoon in the center. I like to use the teaspoon because it makes a perfect indent.
- Place a halved cherry in each cookie.
- In a microwave safe bowl, combine the chocolate chips and sweetened condensed milk. Microwave in 30 second intervals stirring after each one until the chocolate chips are completely melted and smooth.
- Stir in 3 tablespoons of the reserved cherry juice to the chocolate sauce.
- Dollop about a teaspoon or so of sauce on top of the cherry pieces.
- Bake cookies in preheated oven for 8-10 minutes until cookies look set.
- Let cookies cool on pan for 10 minutes and then carefully remove to wire rack to cool completely.

Leave a comment